The UniPG Racing Team Collaboration Is Bearing Fruits
A Qt application and Django backend to measure stats on a Formula-style racing car
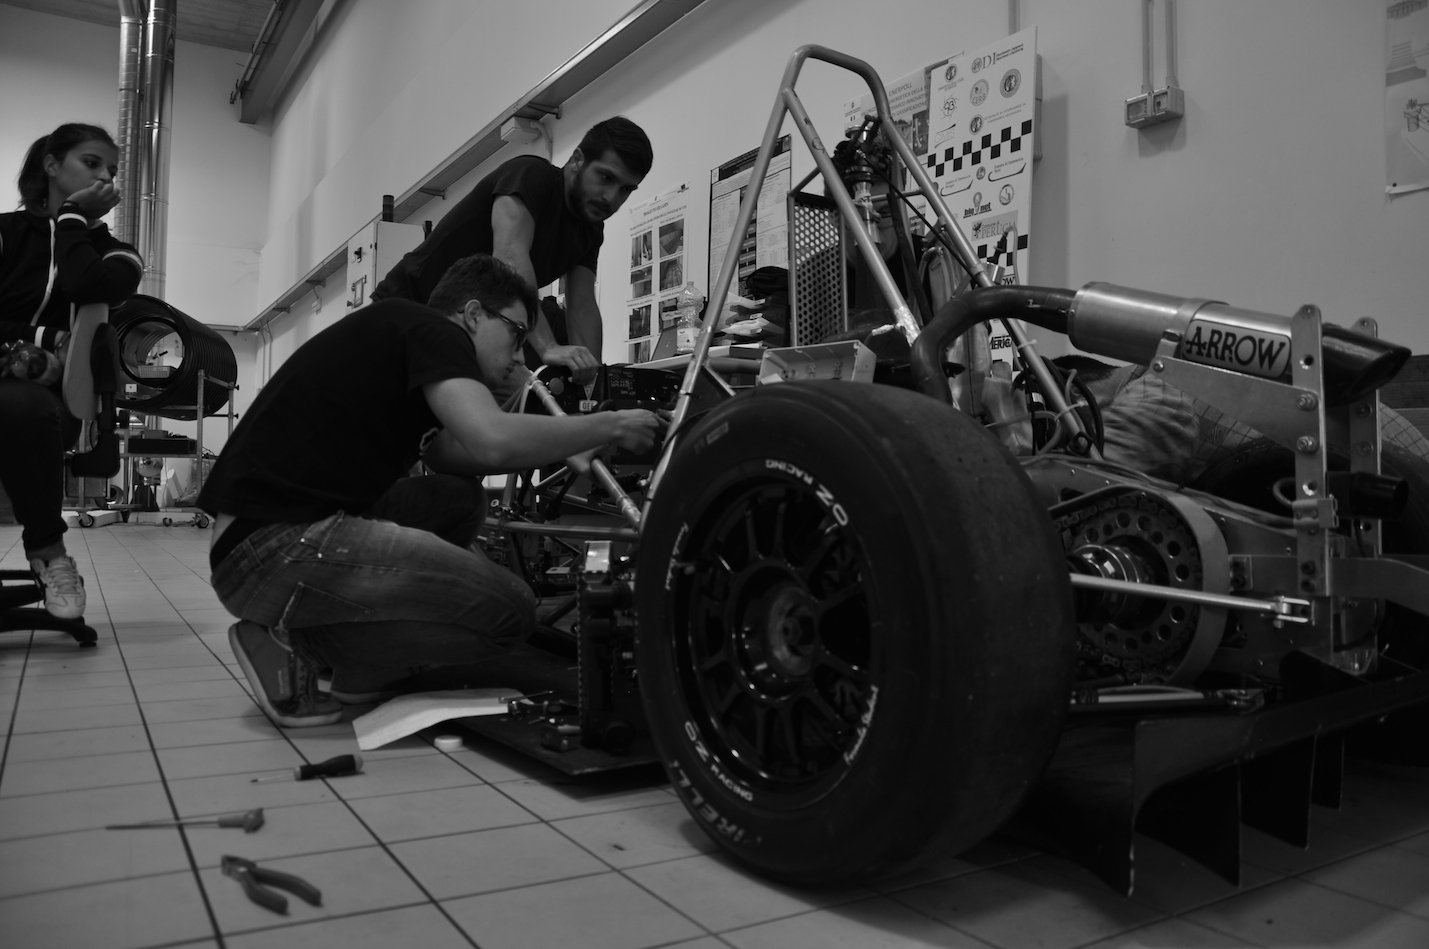
The scope of our collaboration with the University of Perugia Racing Team was to create a hardware device that could attach to their small Formula-style racing car and collect data, and then to create a software that would render that data readable and useful. Some important specifications that we needed to capture were temperature readings, wheel speeds, battery voltage and fuel consumption.
The first phase of the project consists of three major components, which are the hardware to connect to the motor, the software (Slimer) to read the data and that would communicate with the final component, the web service (Tully), through the cloud.
The second phase of the project was all about the two Apps where the data would be visible to end-users. This includes a technical app that reads the data in real-time and a smartphone app that represents the data in graphs.
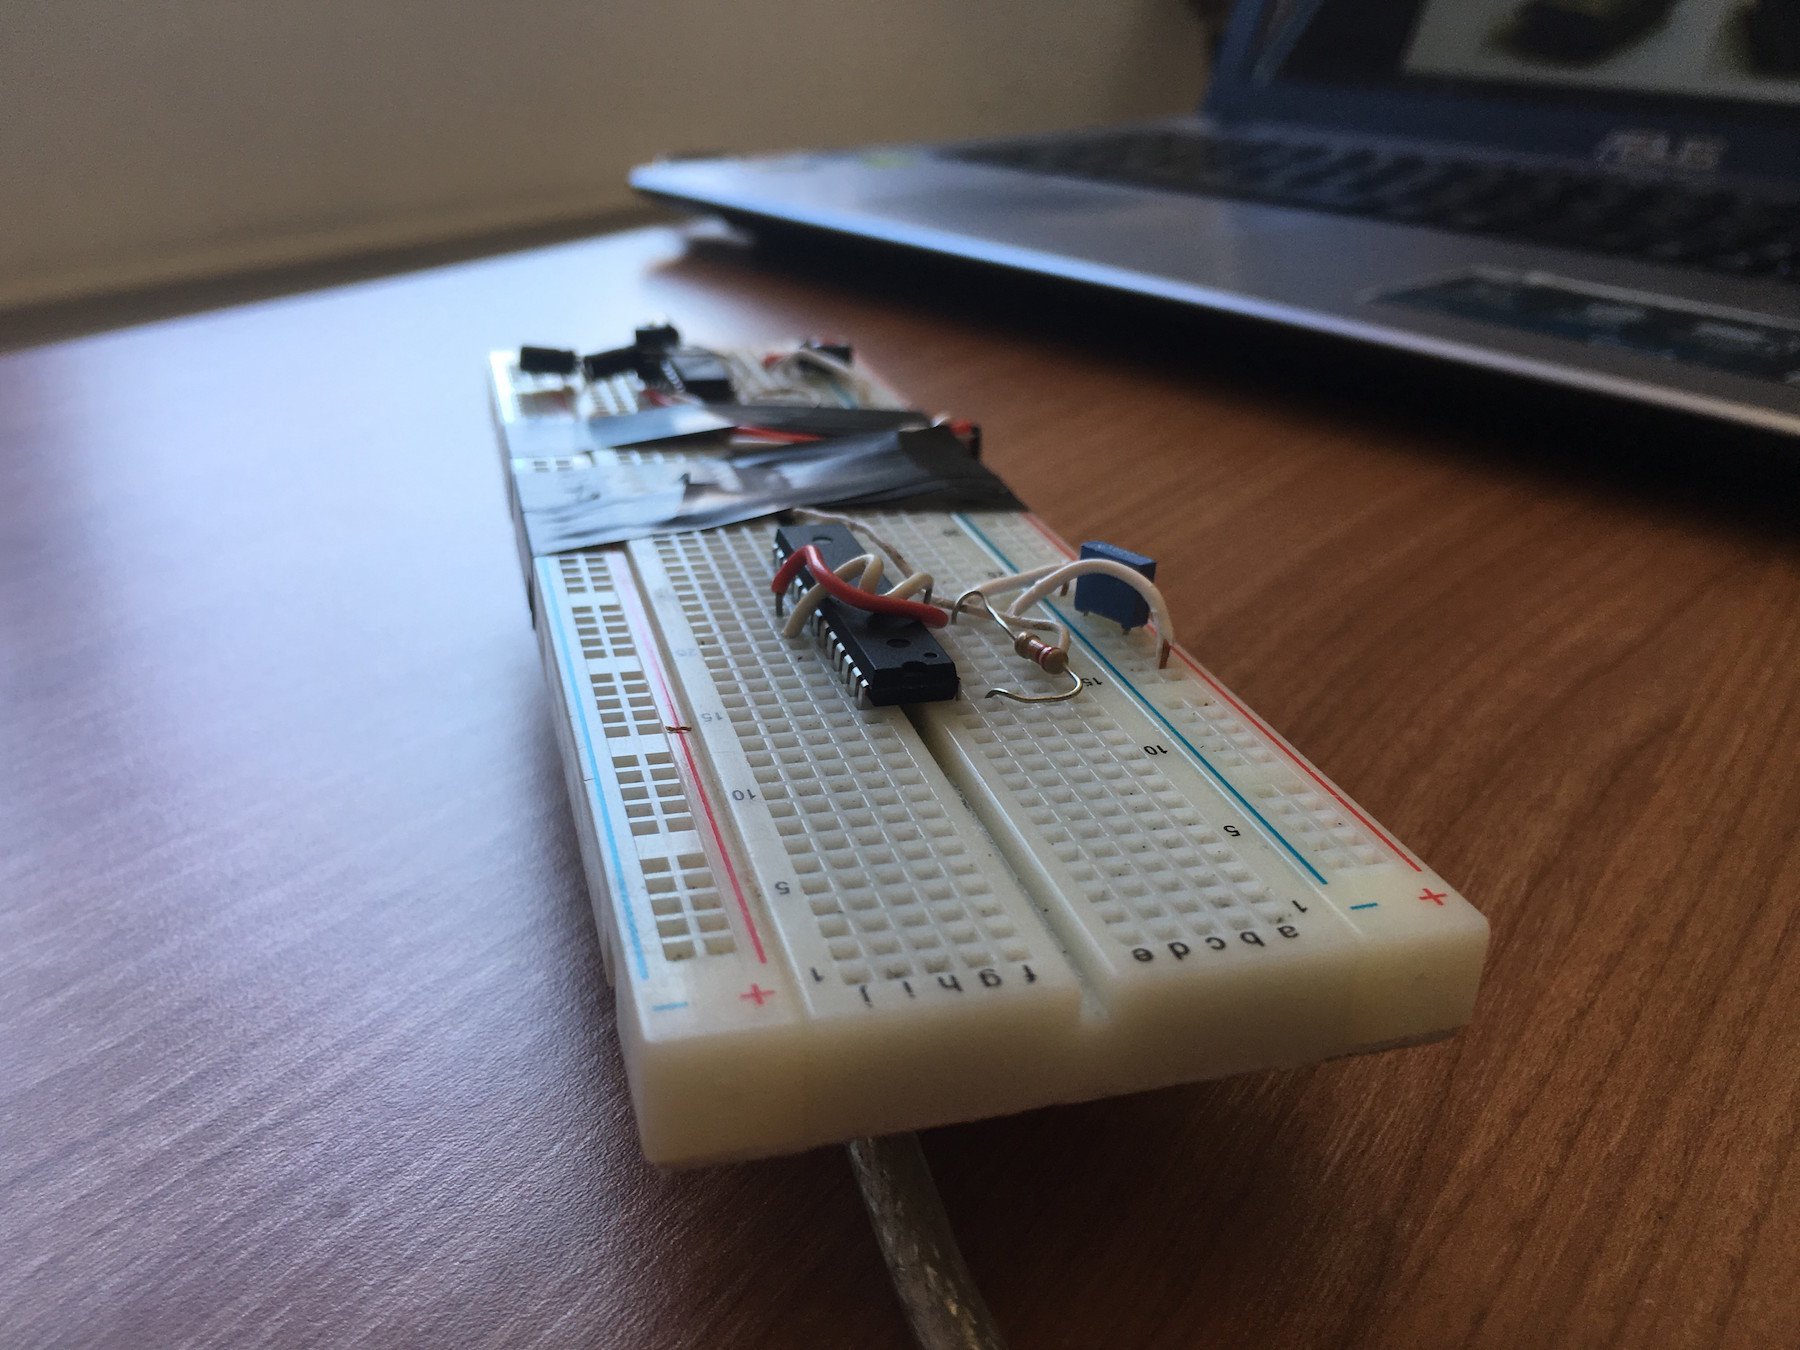
Back to phase one, first we created a device that could latch onto the car’s control unit. The CU communicates only with the car, and this hardware interprets the data and eventually sends it onto Tully.
Slimer
Slimer is a Qt-based software that runs on a Raspberry Pi, which reads the data from the ECU of the car and sends it to the web service (aka Tully). We chose the Qt framework because it offers a ton of high-level APIs that make it easy to perform low-level operations such as sending an HTTP request or reading from a serial port.
Furthermore it’s opensource and has a huge community built up around it, who are glad to offer help when you get stuck at any point. I think I’ve said enough.
Now let’s go back to Slimer. Our service starts at boot and it first tries to connect with the serial port where the ECU is sending messages. When the connection is established we perform these actions in a loop, roughly:- Wait for data available on the serial port
- Read bytes
- Byte sequence validation
- Parse payload (only when a complete message is read)
- Send it to Tully (only when a complete message is read)
The first two steps are pretty straightforward and the effort to implement both is zero because they’re part of the api exposed by QSerialPort class.
1 2 3 4 5 6 7 8 9 10 11 12 13 14 15 16 17 18 19 20 21 22 23 24 25 26 27 28 | PackageState state = START_BYTE_1; QSerialPort *serialPort = new QSerialPort(); serialPort->setPortName("ttyUSB0"); serialPort->setParity(QSerialPort::NoParity); serialPort->setBaudRate(QSerialPort::Baud9600, QSerialPort::Input); serialPort->setStopBits(QSerialPort::OneStop); serialPort->setFlowControl(QSerialPort::NoFlowControl); serialPort->open(QIODevice::ReadOnly); if (serialPort->isOpen()) { qDebug() << "Serial port is open..."; while (serialPort->waitForReadyRead(50)) { QByteArray datas = serialPort->readAll(); if (datas.size() == 0) { qDebug() << "ERROR data not read"; break; } processData(datas, state); QCoreApplication::processEvents(); } } else { qDebug() << "OPEN ERROR: " << serialPort->errorString(); } serialPort->close(); qDebug() << "...serial port is closed!"; emit finished(); |
The 3rd step, byte sequence validation, needs a better explanation. A complete message from the ECU has the following format:
- start marker - 2 bytes [0xAA0x55]
- subsystem id - 1 byte [0x01] - in future we could support more subsystems
- sequence number - 2 bytes - incremented on each message
- payload length - 1 byte
- payload - 255 bytes at most - depends on "payload length"
- crc - 4 bytes
- end marker - 1 byte [0x0F]
We don’t know how many bytes we’re going to read in advance and we can’t make the assumption that we will read a full message every time we read bytes from the serial.
In fact, most of the time we are going to read a very small piece of the message.
What we need is to recognize that the bytes are in the expected order, starting from xAAx55, the beginning of message marker, and finishing with x0F, the end-of-message marker.
In between these two markers, bytes should respect all the constraints defined by the format, otherwise the message will be discarded.
To do that we used a naive implementation of a state machine. It may not look so good but it’s reliable, easy to test and to update. That way we can read a few bytes from the serial port and feed the state machine that will advance its state while storing the partial message on a temporary buffer.
Once the end-of-message marker is read, the state machine enters the FINAL state where it sends the message to the parser.
1 2 3 4 5 6 7 8 9 10 11 12 13 14 15 16 | case EXIT: qDebug() << "EXIT"; if (datas.at(i) == 0x0F) { // Packet end qDebug() << "Correct payload"; m_serialBuffer.append(datas.at(i)); qDebug() << m_serialBuffer.toHex(); qDebug() << m_serialBuffer.size(); m_parser.setPackage(m_serialBuffer); } else{ qDebug() << "Error in last byte"; } m_serialBuffer.clear(); m_payloadIndex = 0x00; m_payloadLength = 0x00; state = START_BYTE_1; break; |
When the parser receives a new payload it’s enqueued and processed. Finally, the message is ready to be sent to our Tully service, which is a pretty easy task using the Qt Network module which provides a set of classes to manage networking operations. The QNetworkAccessManager is the class that allows us to send requests and receive replies, it supplies a group of functions that takes a request and optional data, and each returns a QNetworkReply object.
We call the post() function with our QNetworkRequest instance and the json containing the parsed data. QNetworkRequest is the class holding the information necessary to send a request over the network, such as headers and url. Before preparing our request we need to build our url using the QUrl class and by retrieving the backend url and the user credential from the system env vars; that is done using the class QProcessEnvironment, that holds the environment variables passed to the program.
1 2 3 4 5 6 7 8 9 10 11 12 | auto env = QProcessEnvironment::systemEnvironment(); QUrl url(env.value("SLIMER_BACKEND_URL")); auto userInfo = QString("%1:%2") .arg(env.value("SLIMER_BACKEND_USERNAME")) .arg(env.value("SLIMER_BACKEND_PASSWORD")); url.setUserInfo(userInfo); QNetworkRequest request; request.setUrl(url); request.setHeader(QNetworkRequest::ContentTypeHeader, "application/json"); QString json = QString("{ 'key': value }"); QNetworkReply *reply = m_manager->post(request, json.toUtf8()); |
Then, the state machine moves to the initial state looking for the beginning-of-message marker, so it can start again, reading a new message. When no more messages are received from the serial port, Slimer quits.
Tully
The ball is then passed to Tully, our web service developed with Django, a Python high level web framework.
Tully receives the binary data through its API built with DRF, Django Rest Framework, a flexible toolkit used to build powerful and flexible web APIs.
The data received is serialized and displayed for the tech team to evaluate and compare vital informations about the vehicle so that mechanics can promptly intervene in case of problems with the car.
All in all the project was a success. We want to thank the Racing Team at the University of Perugia for reaching out to us and wish them luck in the upcoming race!
